This tutorial was written by me, any tutorials that resemble this tutorial is purely coincidental. This was written in PSP 8, but with knowledge of PSP you will be able to use this tutorial with other versions.
This was my very first tutorial that I ever wrote.
I wrote this in July of 2006.
Please do NOT take this tutorial and claim as your own.
If you would like to share this tutorial with friends, then by all means send them to my blog!
This was my very first tutorial that I ever wrote.
I wrote this in July of 2006.
Please do NOT take this tutorial and claim as your own.
If you would like to share this tutorial with friends, then by all means send them to my blog!
~What you will need~
Paint shop pro trial HERE
Animation shop trial HERE
DSB Flux download HERE
Image of choice
Font of choice ~ I used Scrap Cursive
Basic PSP Knowledge
And Patience with me, HAHA!
~Let’s Begin!~
Open your 3 new images 160 x 160 pixels
Step 1. Make the 1st image active and let’s work on that
Grab your flood fill icon
Choose a light color of your choice
Flood fill the image
Go to Image>Add Borders: Top, Left, Right, Bottom:5
Choose a dark color of your choice, I chose a dark blue.
Grab your magic wand click on the inside of your image.
Go to Effects>3D Effects>Cutout: V & H: 7, Opacity: 70, Blur: 3, Color: White, Fill interior with color unchecked
Repeat this step; only change the vertical & horizontal to -7.
Duplicate 2 times so that we have 3 images to work with.
Make sure that Copy 2 of background is active.
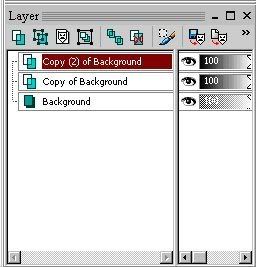
Go to Effects>Plug-ins>DSB Flux> Bright Noise
Settings: Intensity – 35, Mix Checked
Repeat the Bright noise 2 more times
Copy of Background, make the bright noise 30
Background, make the bright noise 25.
Deselect. Ctrl D.
Get your 1st tube copy and paste as new layer
Duplicate this layer 2 times to make 3 layers.
Move the 1st raster 1 layer to just above the background layer. Layers>Merge>Merge Down.
Move the 2nd raster layer to just above the copy of background layer. Layers>Merge>Merge Down.
Move the 3rd raster layer to just above the copy 2 of background layer. Layers>Merge> Merge Down.
Minimize this image.
Step 2. Repeat all of step 1 to just before adding the tube.
Use a different tube for this image when you’ve gotten to the last step again.
Minimize this image.
Step 3. Repeat step 1 again to just before adding the tube.
Save each of your images as image 1, 2 & 3
Open Animation Shop
Open each of your images
Open new image 400 x 400 transparent image.
Duplicate your image 2 times, to make 3 frames. Propagate paste. Select All.
Make your 1st animation active. Select all and copy. Pull into your new image.
Make your 2nd animation active. Select all and copy. Pull into your new image. Be sure to place where you think it looks best. If you mess up simply hit CTRL Z to undo.
Make your 3rd animation active. Select all and copy. Pull into your new image.
Go back to PSP activate your tubes and get the artists info active Copy & Paste. Copy go back to Animation Shop and Paste as new animation. Duplicate 2 times to make 3 frames. Select all and copy. Pull into your new image and place just below one of your animations. You may do the same with your watermark.
To crop your new image: Make sure it’s all active. If need be Select All again. Grab your crop tool. Click Options. Click: surround opaque area. Click OK. Crop
Resize~ Animation>Resize Animation
65 %
Save your back.
~Text~
Select the animation in AS Copy and go back to PSP and Paste.
Grab your Text Tool.
Choose the font you would like to use.
I used Scrap Cursive. Settings below
Create as: Vector, Font of choice, Size: 36,
Stroke Width: 0, Alignment: Center, Font Style: Bold
Type your text in and hit apply.
Grab the little node to turn your text and move it in place next to your butterflies the way you want it.
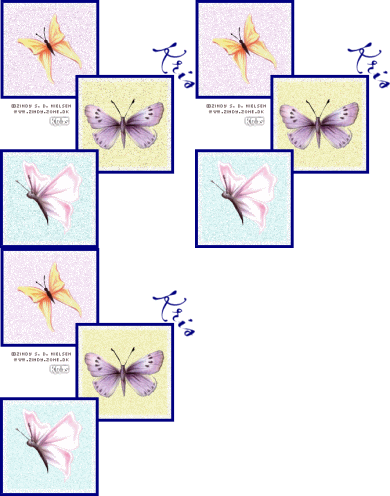
Here is what mine looks like so far
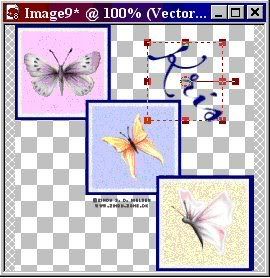
Once you have your text in place. Convert as raster. Layers>Convert to Raster. Duplicate 2 times. Move each layer above your background layers and Layers>Merge>Merge Down.
Add new layer and add your watermark now if you have one. Duplicate this 2 times also and move each of these layers above the background layers and Layers>Merge>Merge Down.
This is what it should look like.
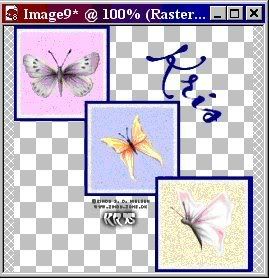
Save and open in AS. View Animation
Here’s another one I made with a different font… this one I used Scrap Calligraphy
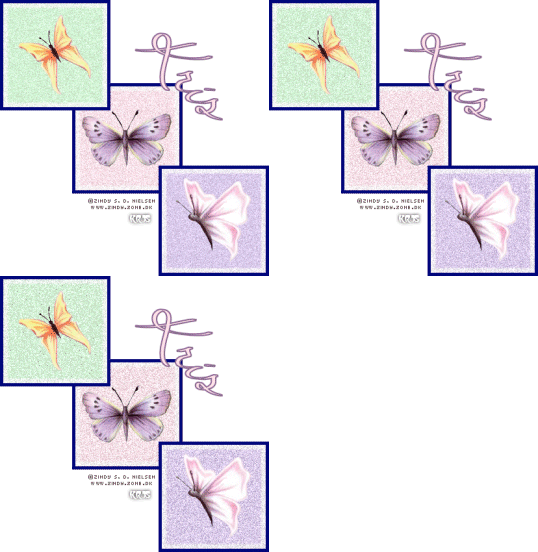
~ That’s It! ~
Thanks for trying my tutorial.
I hope you’ve enjoyed trying and have learned something.
Feel free to email me with any questions you might have!




No comments:
Post a Comment